Tag: Special Bonuses

AWP Neo Noir Factory New Price and Skin...
The AWP Neo-Noir remains one of the most recognizable and stylized weapon finishes in Counter-Strike 2. Players seeking top-tier aesthetic condition often look toward the Factory New version due to its pristine finish and vibrant colors. Understanding its valuation, design elements, and market availability helps collectors and players make informed purchasing decisions.
Visual Design and Aesthetic Appeal
Designed by community artists, the Neo-Noir artwork features a striking comic book illustration in blue, magenta, and grayscale tones. The central graphic depicts two stylized female figures wrapped across the rifle's body. In Factory New condition, the paint application is clean with no visible scratches or wear along the stock and barrel.
This finish uses a custom paint job style that holds its vibrancy exceptionally well. Collectors appreciate how the bright pink and cyan highlights contrast against dark background elements. It stands out as a unique artistic piece among intermediate and high-end sniper rifle skins.
Market Valuation for Factory New Condition
The price for a Factory New AWP Neo-Noir generally floats between $50 and $90 across major skin marketplaces depending on float value. Standard versions sit near the lower end of that range, while ultra-low float values command higher listing prices. StatTrak variants naturally fetch a premium due to their relative scarcity in cases.
Compared to other Covert rarity sniper skins, the Neo-Noir offers an affordable gateway to premium artwork. Market trends show steady demand due to the popularity of both the AWP weapon and the Neo-Noir collection. Players can compare current listings on trusted platforms like Skinport to secure competitive deals.
Float Range and Drop Information
The float range for the Neo-Noir skin spans from 0.00 to 0.50, allowing it to drop in all wear categories. However, to qualify as Factory New, the float value must fall strictly between 0.00 and 0.07. Lower float numbers ensure zero paint degradation on high-visibility areas like the scope.
Originally introduced during the Danger Zone update in December 2018, this skin originates from the Danger Zone Case. Because opening cases offers a low probability for Covert items, most players prefer purchasing the skin directly from third-party markets.
Collector Considerations and Final Verdict
For gamers wanting an iconic weapon finish without paying thousands of dollars, the AWP Neo-Noir in Factory New quality is a compelling choice. It offers excellent visual fidelity and holds liquidity well should you decide to trade it later. Inspecting individual float values before buying ensures you get the cleanest look possible for your loadout.

Is SMAA Better Than FXAA: Anti Aliasing Quality...
Choosing the right anti-aliasing method can dramatically improve your gaming experience by removing harsh, jagged edges from rendered graphics. Fast Approximate Anti-Aliasing (FXAA) and Subpixel Morphological Anti-Aliasing (SMAA) are two popular post-processing techniques designed to smooth visual artifacts without heavily taxing your graphics card. Understanding how these two methods compare in terms of image sharpness and performance will help you decide which setting is superior for your setup.
Understanding Post-Processing Anti-Aliasing Techniques
Post-processing anti-aliasing works by analyzing rendered frames in screen space to detect contrast differences and blend rough pixel edges. FXAA was created to offer an extremely fast smoothing pass, applying a broad blurring filter across detected boundaries to eliminate stair-step artifacts. Because it processes images rapidly after rendering, it requires minimal computational power from your graphics processing unit.
SMAA improves upon traditional post-processing by using advanced pattern recognition algorithms to identify edge shapes before applying targeted blending. This intelligent edge detection allows SMAA to smooth jagged lines without indiscriminately softening fine details. As a result, it delivers a more refined output compared to earlier post-processing solutions.
Visual Clarity and Image Sharpness Comparison
When comparing visual quality, SMAA consistently delivers a sharper and clearer image than FXAA. FXAA tends to apply a uniform softening effect over the entire screen, which often causes background textures, in-game text, and delicate geometric lines to appear blurry. This aggressive blur can obscure fine visual details in complex game environments.
In contrast, SMAA maintains higher texture fidelity while effectively reducing aliasing along object borders. It preserves crisp subpixel details, making vegetation, UI elements, and distant foliage look significantly clearer. For players who value image clarity, SMAA offers a noticeable visual upgrade over FXAA.
Performance Impact on Modern Hardware
Performance cost is a critical factor when tweaking graphical options in demanding video games. FXAA remains the lightweight champion, consuming less than one percent of GPU resources in most gaming scenarios. This minimal impact makes FXAA an appealing choice for entry-level graphics cards or competitive esports games where high frame rates are vital.
While SMAA requires slightly more GPU processing power than FXAA, its performance footprint remains remarkably low compared to traditional methods like MSAA or SSAA. Most modern gaming systems experience only a tiny drop of one to two frames per second when selecting SMAA. The dramatic gain in visual quality far outweighs the tiny frame rate cost on almost all hardware configurations.
Choosing the Best Anti-Aliasing Setting for Your Gaming Setup
If your graphics hardware allows for it, SMAA is generally the better overall choice for balancing performance and visual quality. It provides crisp edges and retains vital environmental detail without causing noticeable frame rate drops. Gamers seeking a clean image on mid-tier or modern GPUs will likely find SMAA superior in nearly every genre.
However, FXAA still serves a purpose on lower-end systems where every single frame counts toward playable gameplay. You can explore to learn more about optimizing game performance and tweaking graphic settings effectively. Ultimately, testing both settings in your favorite games will help you strike the ideal balance between smooth performance and razor-sharp visuals.
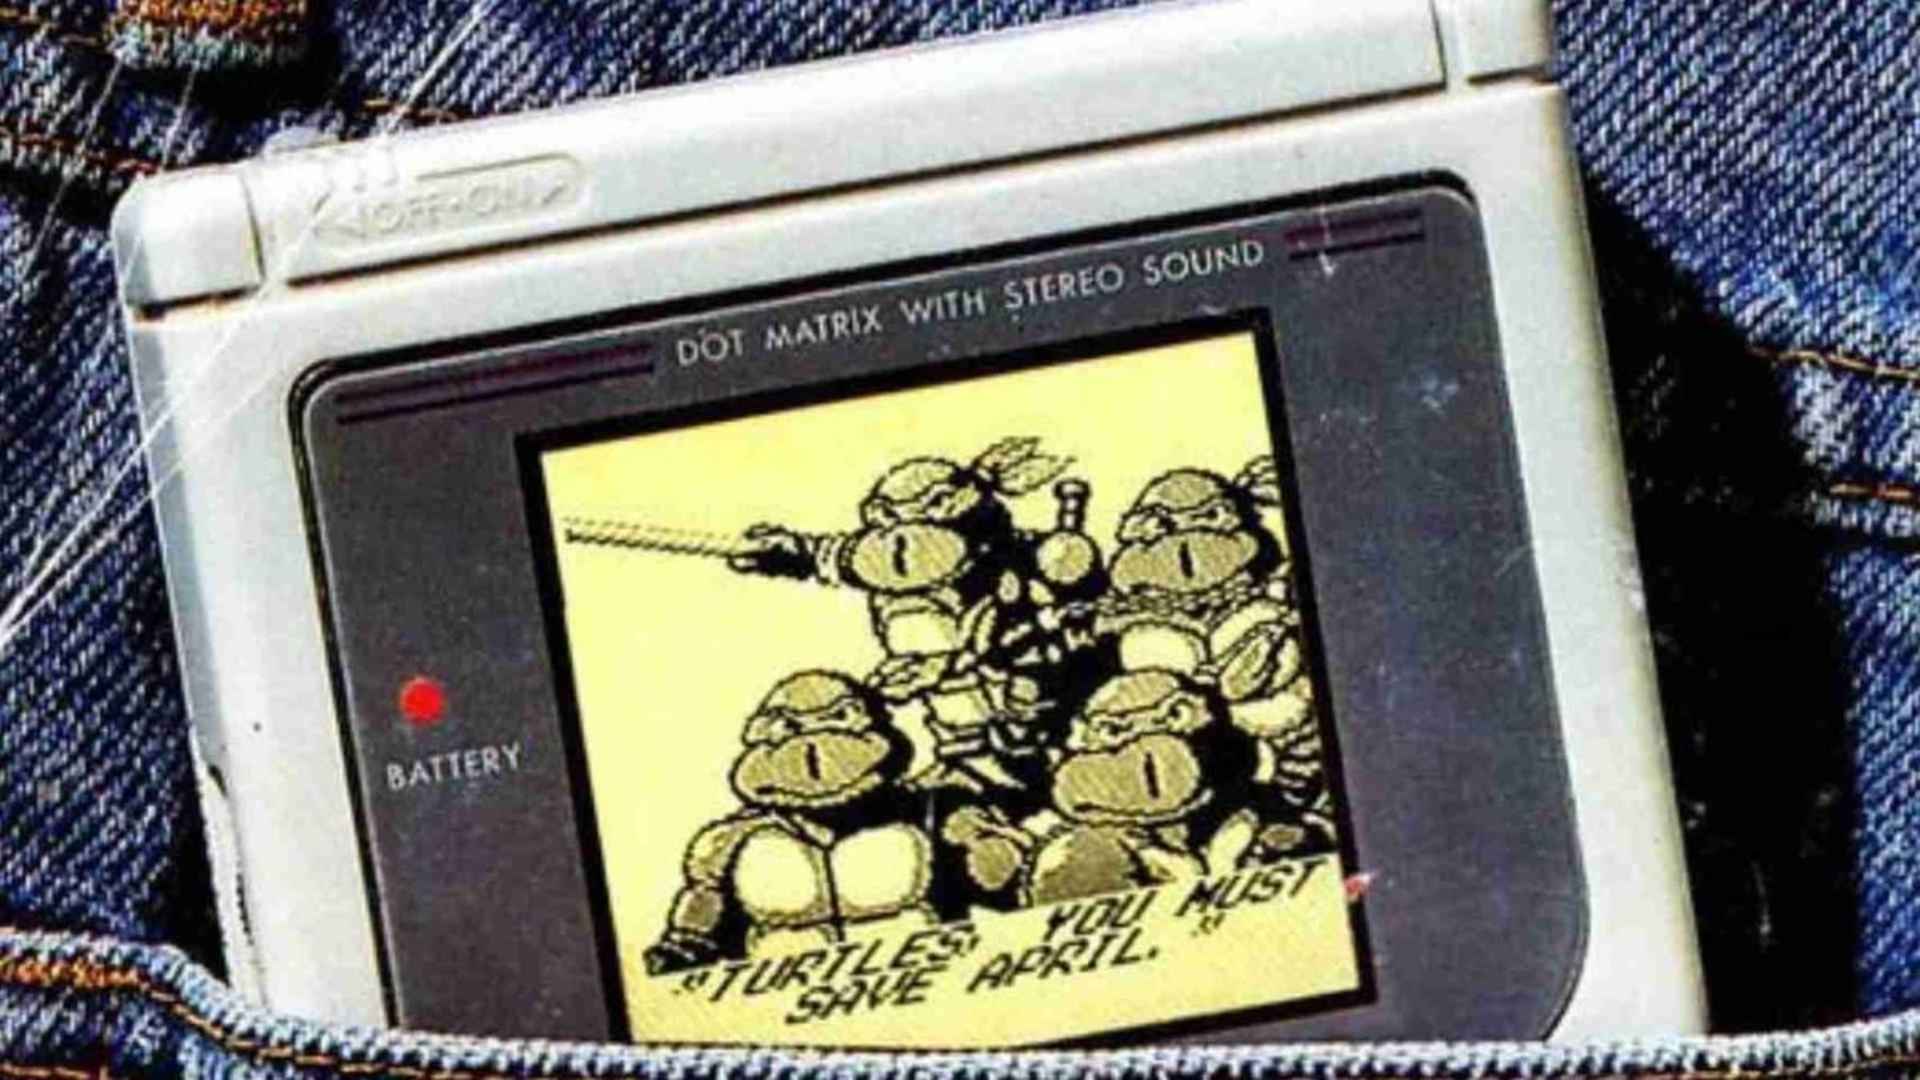
Super Smash Bros How to Unlock Characters Quickly
Unlocking the full roster in Super Smash Bros Ultimate can feel like a daunting task when starting from the default eight fighters. Players often want to access their favorite competitive main or party character without spending dozens of hours grinding through single-player campaigns. Fortunately, understanding how the game handles trigger conditions allows you to recruit every fighter in a fraction of the standard time.
Understanding the Internal Unlock Timer
Super Smash Bros Ultimate triggers new challenger encounters based on a combination of active gameplay inputs and an internal cooldown timer. Under normal conditions, the game presents a new fighter challenge roughly every ten minutes of active match time. Understanding this mechanic helps players exploit the system rather than waiting passively between matches.
The system tracks actual movement and button inputs during matches rather than idle time on menus. Because of this tracking mechanism, simply leaving the game running on a menu screen will not trigger new challenger appearances. Active participation in short matches is essential to consistently push the unlock queue forward.
The Versus Mode Software Reset Strategy
The fastest known method to bypass the standard ten-minute waiting period involves playing short Versus matches followed by a complete software restart. By setting up a 1-stock match against a CPU opponent, you can quickly finish the round by jumping off the stage or defeating the computer. Once the match concludes, a new challenger will immediately appear to challenge your active fighter.
After defeating or losing to the incoming fighter, return to the Nintendo Switch home screen and close the game application completely. Relaunching the title instantly resets the hidden internal timer that usually delays subsequent encounters. Repeating this quick cycle allows players to unlock multiple roster members in under two hours. To learn more details about optimizing your setups, check for game strategies.
Targeting Specific Fighters via Classic Mode
If you are looking to unlock a specific character rather than random arrivals, playing Classic Mode offers structured unlock paths. Every starting character belongs to a unique unlock tree that predictable leads to specific roster additions upon completion. For example, finishing a Classic Mode run with Mario consistently triggers an encounter with Sonic on the first try.
Classic Mode runs take around seven to ten minutes each, making them slightly slower than the Versus mode trick but far more targeted. This mode is ideal for players who want to practice basic movesets while systematically working through a preferred character branch. Continuing down a specific tree will eventually unlock all fighters connected to that original starter.
Rematching Lost Opponents in Challenger Approach
Failing to beat a tough challenger during an unlock encounter does not lock that character away permanently. Instead of immediately re-triggering the unlock conditions, missed fighters are automatically placed in a rematch queue called Challenger's Approach. This option appears as a glowing door icon in the lower corner of the Games & More menu screen.
Checking the Challenger's Approach menu periodically gives you another opportunity to defeat missed characters using your best unlocked main. You can attempt these rematch battles as often as needed until the opponent is successfully added to your main roster. This system ensures that no losses permanently halt your progress toward securing a complete fighter lineup.

Where To Buy Lockpicks Oblivion And How To...
Lockpicks are among the most essential tools in The Elder Scrolls IV: Oblivion, yet standard merchants rarely stock them in their inventories. Running out of picks during a dungeon crawl or burglary can instantly stall your progress across Cyrodiil. Knowing where to locate specialized vendors and how to preserve your stash ensures you never get locked out of valuable treasure.
The Best Vendors for Purchasing Lockpicks
For players starting out, the absolute best early-game vendor is Shady Sam, who sets up shop outside the Imperial City walls near Chestnut Handy Stables. He stands against the exterior wall and sells a reliable batch of thirty picks that re-stock every few days. Because he operates outside standard merchant laws, you can approach him day or night without joining any specific factions.
Joining the Thieves Guild opens up additional reliable purchasing options through guild fences and doyens. Merchants like Armand Christophe, Luciana Galena, and Ongar the World-Weary stock plenty of tools for aspiring thieves. If you prefer a darker path, joining the Dark Brotherhood gives you access to faction merchants who also carry lockpicks in decent quantities.
Looting and Farming Lockpicks in the Wild
Buying lockpicks is convenient, but you can easily supplement your stock by looting enemies throughout Cyrodiil. Bandits, thieves, and goblins frequently carry one to three lockpicks on their bodies, making their hideouts ideal farming spots. Regularly searching enemy corpses and dungeon crates will steadily build your inventory without spending single gold septim.
Dungeons, forts, and Ayleid ruins are particularly lucrative places to find picks scattered in wooden chests. Developing a habit of thorough looting ensures a continuous stream of tools during long adventuring trips. Combine active looting with visits to key vendors to build a massive surplus very quickly.
Tips for Preserving Your Lockpick Supply
Preserving your inventory comes down to mastering the timing of the lockpicking minigame rather than relying on automatic attempts. Pay close attention to the speed of the tumbler as it rises, and only click to secure it when it moves slowly toward the top. Practicing this manual technique dramatically reduces the number of broken picks on high-level locks.
Raising your Security skill directly improves tumbler control, making picking far easier and less wasteful over time. You can also utilize Open spells from the Alteration magic tree to bypass physical locks entirely. Once your character reaches level ten, completing Nocturnal's quest yields the Skeleton Key, an unbreakable pick that eliminates tool consumption permanently.

How To See Float On Steam Market And...
Navigating the Counter-Strike market requires more than just checking baseline tags like Field-Tested or Factory New to understand an item's actual value. Every weapon skin possesses a specific wear value that determines its physical appearance, scratches, and overall cleanliness in the game. Learning how to reveal these hidden metrics on the Steam Community Market is essential for anyone looking to make smart purchases or accurately price their own items.
Understanding the Importance of Skin Float Values
The precise wear condition of a skin is defined by a decimal number ranging between 0.00 and 1.00, commonly known as the float value. A lower number indicates a pristine weapon finish, while a value closer to 1.00 represents heavy battle damage and numerous cosmetic blemishes. Two items sharing the exact same exterior classification can carry vastly different values based entirely on where they land on this numerical spectrum.
Savory collectors frequently browse marketplace listings specifically seeking exceptionally low or unique floats that warrant a higher price point. Consequently, understanding how to verify these numbers ensures you do not accidentally overpay for a standard item or list a rare piece for less than its true market worth.
Utilizing Browser Extensions for Instant Market Data
The most seamless method to evaluate listed skins directly on your web browser is by installing dedicated community extensions. Highly regarded tools like the CSFloat Market Checker integrate directly into your desktop browser to fetch real-time item statistics instantly. Once activated, these plugins automatically display the precise wear rating, paint seed, and visual phase right beneath each listing on the Steam market pages.
This method saves tremendous time by eliminating the need to manually inspect each individual weapon one by one in the actual game client. It also introduces advanced sorting features, allowing smart buyers to instantly organize active marketplace listings from the cleanest to the most worn conditions.
Checking Float Values via Game Client and Online Tools
If you prefer not to use browser extensions, you can still retrieve an item's wear rating manually through alternative methods. Every active market listing features an option to inspect the weapon inside the game client, which launches the counter-strike interface to display the physical item. Inside this inspection panel, hovering over the small information icon reveals the definitive wear rating assigned to that specific skin.
Alternatively, players can right-click the game inspection button on the Steam market to copy the absolute link address of the item. This specific inspect link can then be pasted into reputable external database websites to instantly populate the exact wear metrics without ever launching your game.
Balancing Item Prices with Market Analytics
Accurately pricing your items or determining if a listing is a good deal requires cross-referencing your findings with current sales history. Weapon values change dynamically based on supply, current competitive seasons, and overall community aesthetic preferences. Comparing Steam market baseline values against specialized third-party trading sites provides a balanced overview of what collectors are actually willing to pay at any given moment.
Keep in mind that certain item patterns or popular stickers applied to the weapon can also shift the overall valuation alongside its wear rating. Taking the time to research these technical factors protects your digital assets and gives you a distinct advantage within the virtual economy.

What Order To Watch Clone Wars For The...
Diving into the expansive Star Wars animated universe can be an intimidating task for newcomers looking to understand the galactic conflict. Because the series was originally broadcast as an anthology with jumbled timelines, finding the absolute best way to watch the epic saga requires a bit of planning. Choosing the right viewing sequence can completely transform how you perceive character growth and major narrative shifts.
The Challenges of Original Broadcast Order
When the show first aired on television, episodes were often released out of chronological sequence due to production schedules and creative choices. This erratic structure can puzzle viewers who expect a continuous storyline, as characters who die in one week might reappear completely unharmed in the next episode. Following the broadcast order can occasionally disrupt the dramatic tension and break the flow of critical multi-episode story arcs.
For individuals who value a seamless narrative transition, this scattered presentation can make it difficult to appreciate the escalating stakes of the war. Important military campaigns and political shifting points feel isolated rather than building toward a grand conclusion. Consequently, many dedicated fans recommend looking past the release dates to find a more satisfying structural arrangement.
Embracing the Chronological Sequence
Watching the series in true chronological order resolves these timeline contradictions and allows the overarching plot to develop naturally. This viewing path clarifies the evolution of various clone legions and provides a stable foundation for the political landscape of the galaxy. Viewers can track the steady progression of the pan-galactic conflict from its earliest skirmishes directly to the dark events of the outer rim sieges.
This sequential approach significantly enhances the emotional weight of character relationships as friendships grow steadily over multiple seasons. You witness the gradual bond forming between main heroes without sudden jumps backward in time disrupting your immersion. It remains the most widely supported arrangement for individuals who want to treat the anthology like a traditional, linear television show.
Prioritizing Character Arcs for Ultimate Impact
Another compelling option focuses strictly on organizing the episodes around specific character trajectories to maximize dramatic resonance. By focusing on the gradual development of key figures like Ahsoka Tano or Captain Rex, the emotional payoffs feel far more earned and intense. This method allows viewers to see the subtle behavioral changes that mirror the corrupting influence of the long galactic war.
The slow transformation of relationship dynamics becomes the central driving force of the viewing experience rather than just the galactic sandbox timeline. Witnessing a young apprentice evolve into a seasoned warrior provides a powerful narrative spine that keeps audiences completely engaged. This tailored structure highlights the tragic elements of the narrative as individual destinies slowly align with the unavoidable fall of the Republic.
The Ultimate Narrative Hybrid Path
For the absolute definitive experience, combining strict chronology with thematic groupings provides the best of both storytelling worlds. This hybrid system preserves the natural timeline while ensuring that massive multi-part story blocks are never broken up by random standalone episodes. It maintains a steady thematic momentum that honors the grand architectural design of the prequel era cinematic universe.
Navigating the final chapters with this organized framework ensures that the ultimate emotional climax lands with maximum cinematic force. The final arcs blend seamlessly with the events of the mainstream feature films, creating an unforgettable and continuous viewing experience. This refined sequence ensures that every battle, betrayal, and heroic sacrifice feels entirely purposeful and beautifully paced.

How to Get Final Form KH2 Complete Kingdom...
Unlocking the most powerful drive ability in Kingdom Hearts 2 completely changes your combat capabilities during the late game. While standard transformations offer distinct elemental and physical advantages, this ultimate form allows Sora to wield two Keyblades simultaneously using telekinetic power. Learning how to get Final Form KH2 mechanics sorted out requires reaching a specific story milestone and understanding the hidden probability systems behind the game's transformation loop.
The Critical Story Milestone Requirement
Before you can attempt to unlock this silver-clad combat state, you must progress through the main storyline until you reach the Memory's Skyscraper area in The World That Never Was. A pivotal cutscene battle against Roxas takes place here, which officially adds the hidden chance of obtaining the ultimate power into your active gameplay pool. Attempting to trigger the form before completing this memorable encounter is impossible since the game locks the ability until this exact scenario concluded.
Understanding the Hidden Anti Form Trigger Mechanism
Once the encounter with Roxas is complete, the ultimate combat state is obtained through a random activation chance whenever you attempt to use any other Drive Form during battle. Every standard transformation carries a hidden probability calculation that normally risks forcing Sora into the shadow-like Anti-Form. However, following the skyscraper event, this exact negative trigger mechanism is modified to potentially reward you with the majestic silver transformation instead.
The Best Locations to Farm Your Transformation
To acquire the form quickly, players frequently travel to areas where they can repeatedly enter combat zones and reset their drive meters efficiently. The Cerberus Paradox Cup in Olympus Coliseum or the areas surrounding the Memory's Skyscraper provide excellent environments for rapid transformation attempts. Entering a tournament or transitioning between specific room boundaries allows you to instantly replenish your resources if the random calculation fails to give you the desired result.
Optimizing Your Strategy and Equipment Setup
Equipping specific weapons can significantly speed up your progress when grinding for this elusive battle configuration. Utilizing the Two Become One Keyblade, which is obtained after defeating Roxas, transforms all standard drive attempts into either Anti-Form or the ultimate silver variant. This specific item bypasses the standard random percentages, making it the premier choice for players who want to unlock the full potential of their combat roster without wasting hours on standard probability cycles.
Maxing Out Your New Late Game Power
After successfully triggering the ability for the first time, it becomes a permanent selection on your command menu that requires five full bars from your gauge to activate. Levelling up this combat state requires defeating Nobodies, with each defeated enemy offering exactly one experience point toward your progression goal. Maximizing this level cap is highly recommended as it grants Sora permanent movement upgrades, including the invaluable Glide ability, which is essential for surviving the game's toughest secret boss encounters.

luigi's mansion 3 shark boss Shark Boss Guide...
Luigi's Mansion 3 takes players on a spooky yet charming adventure through the towering Last Resort hotel, where each floor introduces unique thematic challenges and memorable spectral entities. Among the most creative encounters in the game is the fierce nautical showdown on the 12th floor, known as The Spectral Catch. Here, players must square off against Captain Fishhook, a ghostly pirate who transforms the arena into a hazardous seafaring battleground. Mastering this encounter requires a blend of spatial awareness, quick reflexes, and smart utilization of Luigi's Poltergust G-00 mechanics.
Preparing for the Nautical Showdown
Before stepping onto the pirate ship, ensuring you understand the unique arena dynamics will save you from taking unnecessary damage. The boss utilizes the environment to catch players off guard, making constant movement essential during the opening phase. It is highly recommended that you practice your Burst ability beforehand, as timing this move correctly is critical for dodging incoming explosive hazards.
The battlefield itself changes rapidly as the ghostly shark merges with the wooden floorboards to pursue its target from below. Keeping an eye on the shifting shadows and splinters will give you a clear indication of where the spectral threat will emerge next. Maintaining a safe distance from the edges of the ship prevents Luigi from getting cornered when the aggressive ghost lunges forward.
Navigating the Ghostly Ship Mechanics
The fight officially intensifies when Captain Fishhook possesses the ship's deck, turning the wood into a fluid, swimming medium. During this terrifying phase, the boss swims through the boards like a predator in open water, aiming to bite Luigi from underneath. To counter this, players must guide Luigi away from the moving ripples and prepare to use explosive items scattered across the deck.
Periodically, standard yellow ghosts will join the fray to distract you from the main objective while the captain prepares his heavy attacks. Quickly flashing these minor spectral pests with your Strobulb allows you to clear the field and refocus your attention on the primary target. Managing these smaller threats efficiently ensures you do not get overwhelmed when the ship begins to tilt dangerously.
Exploiting Flaws in the Shark Attack Strategy
Defeating the maritime menace relies heavily on turning the captain's own weapons against him during his most aggressive animations. When the giant spectral shark leaps into the air or bites down onto the deck, it occasionally gets its sharp hooks stuck firmly in the wood. This leaves the boss completely immobilized for a brief window, creating the perfect opportunity for a decisive counterattack.
While the ghost is trapped, rush forward immediately to fire a Suction Shot plunger directly onto its exposed chest target. Once the plunger is securely attached, use the Poltergust G-00 to pull back on the rope with all your might to initiate a powerful slamming sequence. Repeating this execution pattern systematically will drain the captain's health bar and advance you closer to securing the elevator button.

Where to Find Cyclops Engine Fragments and What...
In Subnautica, constructing the massive Cyclops submarine is a major turning point that transforms your exploration capabilities across the ocean planet 4546B. To unlock this mobile deep-sea fortress, players must scan three distinct sets of blueprints, with the engine components often proving to be the most elusive. Locating these wreckage parts requires venturing into some of the game's more hazardous biomes, balancing the risk of leviathan encounters against the reward of advanced technology.
Top Locations for Engine Fragments
The safest place to begin your search is within the Mountains biome, particularly around the grand alien structure where several wreckage pieces frequently spawn on the seabed. Another reliable option is the Underwater Islands biome, which houses a large, prominent cargo wreck containing vital components hidden along its lower ledges. For adventurous divers, exploring the sandy trenches of the Crag Field offers an alternative route to complete the blueprint without dealing with immediate extreme hazards.
Many players also investigate the Crash Zone surrounding the downed Aurora, although this region requires immense caution due to patrolling Reaper Leviathans. Searching the seafloor directly behind the ship's massive engines can yield multiple pieces quickly if you maintain high situational awareness. If you prefer a stealthier approach, searching the outskirts of the northeastern Mushroom Forest can occasionally reward you with the remaining pieces needed for your blueprint.
What the Completed Blueprints Unlock
Once you successfully scan all three required engine fragments, alongside the bridge and hull blueprints, you unlock the complete fabrication recipe for the Cyclops. This vehicle functions as a fully customizable mobile base, allowing you to build storage units, fabricators, and battery chargers inside its hull. It serves as an essential tool for transitioning your gameplay from shallow-water survival to sustained, deep-subsurface exploration missions.
Beyond its utility as a floating habitat, constructing this vehicle unlocks the ability to transport smaller assets like the Seamoth or the Prawn Suit across great distances safely. It possesses an exceptional diving depth and an integrated docking bay that automatically recharges your docked vehicles while traveling. This capability is absolutely necessary for reaching the game's late-stage volcanic biomes and completing the overarching narrative.

Witcher 3 Witcher Gear Locations Complete Guide
In The Witcher 3: Wild Hunt, tracking down specialized Witcher School gear is one of the most rewarding pursuits for players looking to survive the brutal landscapes of the Continent. Unlike standard loot found in random chests, these specialized armor sets and swords offer unique statistical bonuses tailored to specific combat styles. Finding the hidden diagrams requires embarking on Scavenger Hunt quests, which are triggered by purchasing maps from merchants or randomly stumbling upon forgotten ruins.
The Balanced Approach of the Wolf School
The Wolven gear set provides a well-rounded option that perfectly mirrors Geralt of Rivia's signature fighting style. It offers balanced enhancements for attack power, sign intensity, and adrenaline point gain, making it ideal for hybrid builds. The initial diagrams for this versatile set are located within the mountainous region of Kaer Morhen, specifically around the ruined watchtower and nearby caverns.
As you progress through the game, upgrading this set requires tracking down higher-tier diagrams hidden across Velen and Skellige. Players often prefer this set because it allows them to seamlessly switch between swordplay and magic during intense monster encounters. Keeping your equipment updated ensures you retain a competitive edge against high-level threats.
The Defensive Might of the Ursine Bear School
For players who prefer a defensive, heavy-hitting approach, the Ursine gear from the Bear School is an unmatched choice. This heavy armor set significantly boosts your resistance to physical damage and monster attacks while generating substantial adrenaline points. The primary diagrams are scattered across the freezing islands of Skellige, hidden deep inside fortified ruins and coastal caves.
Using heavy attacks alongside this gear allows players to tank massive damage that would otherwise easily crush lighter builds. However, the heavy weight slows stamina regeneration, meaning you must rely more on raw physical power than frequent casting. It remains a fan favorite for tackling the game's toughest boss fights on the highest difficulty levels.
The Offensive Speed of Cat and Griffin Schools
If your playstyle revolves around rapid strikes or powerful magic, the Feline and Griffin sets offer specialized alternatives. The Cat School gear focuses heavily on light armor and massive critical strike bonuses, requiring players to explore hidden chambers beneath Novigrad. Meanwhile, the Griffin School gear maximizes sign intensity, turning Geralt into a true battle mage capable of burning or knocking down entire groups of enemies with ease.
Both sets require careful positioning and resource management since they do not offer the same raw protection as heavy armor. Choosing between these paths depends entirely on whether you prefer high-speed blade choreography or destructive spellcasting cycles. Exploring the world fully will eventually yield the diagrams necessary to maximize your chosen path.

Stardew Valley Most Profitable Spring Crop For Maximum...
Starting a new year in Stardew Valley presents players with a fresh opportunity to optimize their agricultural layouts for maximum gold. Choosing the right seeds during the initial season lays a strong financial foundation for the rest of your farming journey. While many options are available at Pierre's General Store, focusing on the most efficient producers will drastically increase your seasonal earnings.
The Undisputed King of Spring Revenue
Strawberries stand out as the absolute most lucrative choice for players looking to maximize their pocketbooks before summer arrives. These berries continue to produce multiple yields after the initial growth cycle, making them highly efficient over time. However, acquiring these seeds requires planning since they are only sold at the annual Egg Festival on the thirteenth day.
To secure a massive payout, experienced growers save a significant amount of capital ahead of the seasonal festival. Planting them immediately on the night of the festival ensures you receive two full harvests before the season concludes. Keeping a few high-quality berries for the Seed Maker can also help jumpstart your greenhouse operation later in the year.
High Yielding Alternative Choices
For players who prefer not to wait until the middle of the season, Rhubarb provides an excellent secondary source of income. Purchased exclusively from the Oasis shop in the desert, this crop yields an impressive profit margin for established farmers. It does require unlocking the bus repair line early, but the financial return justifies the initial investment.
If you are still operating in your very first year, Cauliflower represents a solid alternative option available from day one. While it takes twelve full days to mature, its high base value creates a massive influx of gold upon harvest. There is also a small chance for these plants to merge into a giant crop, yielding even more resources.
Quick Turnaround Options for Capital
Potatoes offer an exceptional way to generate fast cash flow during the opening weeks of the spring season. They have a short six-day maturation period and feature a random chance to yield multiple items from a single harvest. This predictable cycle allows you to reinvest your earnings rapidly into more valuable assets.
Parsnips should not be overlooked by players looking to level up their farming skills as quickly as possible. Their extremely low investment cost makes them perfect for filling empty spaces in your initial watering patterns. Utilizing basic fertilizer with these quick crops ensures a steady supply of high-quality goods for energy or fast sales.
Processing Crops for Maximum Valuation
To truly maximize your gold output, passing your harvested goods through artisan equipment is highly recommended. Turning your top-tier fruits into wine using kegs multiplies their base value significantly over a short period. Even lower-quality produce becomes incredibly valuable when processed into jelly using a standard preserves jar.
Balancing quick-selling crops with long-term artisan processing ensures your farm maintains stable working capital throughout the year. Focusing your efforts on these high-performing options allows you to unlock expensive community upgrades much faster. By planning your layout around these key producers, your seasonal income will easily surpass expectations.

How to Unlock Smash Characters Complete Super Smash...
Super Smash Bros Ultimate boasts one of the most expansive rosters in fighting game history, but starting the game with only the original eight fighters can feel quite daunting. Fortunately, Nintendo designed multiple pathways for players to expand their character select screen to its full potential. Understanding the unique mechanics behind these acquisition methods will save you hours of unnecessary grinding.
The Classic Versus Mode Route
The most straightforward method to trigger new character encounters is by playing standard multiplayer or local Versus matches. The internal system tracks your active gameplay distance and inputs, triggering a new challenger fight roughly every ten minutes after a match concludes. Winning these sudden showdowns immediately adds the defeated character to your permanent character selection screen.
To optimize this process, many players utilize a quick reset technique to bypass the built-in ten-minute cooldown timer. By closing the software completely from the home menu after a challenger appears, you can immediately trigger another fight upon reloading and finishing a brief one-stock match. This remains the fastest organic way to expand your roster when playing casually with friends.
Journeying Through Classic Mode Order
For players who prefer a structured single-player experience, Classic Mode offers a highly predictable pathway to target specific fighters. Completing a run with a particular character initiates a predetermined chain of unlocks at the end of the credits sequence. Each of the starting eight fighters governs a unique branch of the roster tree.
For instance, continually beating Classic Mode with Mario will sequentially unlock fighters like Sonic, Bayonetta, and Little Mac. If you already have the next character in a specific chain unlocked via another mode, the game automatically skips to the next available fighter in that lineage. This method allows you to specifically prioritize your favorite combatants without relying on random encounters.
Exploring the World of Light Campaign
The expansive Adventure Mode, known as World of Light, offers a completely separate environment for unlocking the massive cast of characters. As you traverse the massive overworld map, you will encounter awakening battles where you must defeat corrupted versions of the fighters. Saving them in this mode simultaneously unlocks them for use across all other standard gameplay modes.
While this campaign route takes considerably longer than grinding standard versus matches, it provides a highly immersive and rewarding progression loop. It also allows you to experiment with unique spirit combinations and attribute enhancements while naturally building your roster. Players seeking absolute completion will want to tackle this story mode eventually to experience everything the game has to offer.
Utilizing the Challenger Approach Rematch Door
Losing to a powerful unlockable character can be frustrating, but the developers included a dedicated safety net for failed attempts. When a challenger defeats you, they do not disappear back into the massive roster indefinitely. Instead, they wait in a special hidden menu section located within the Games and More hub.
Known as Challenger's Approach, this small door icon appears periodically after you have accumulated a few more minutes of standard gameplay. Entering this mode allows you to initiate a rematch against any previously victorious character using whichever fighter you prefer. Taking advantage of this feature ensures that no combatant stays locked behind an accidental early-game defeat.

Guiding Light God of War Ragnarok Quest Walkthrough...
Navigating the frozen, expansive landscapes of Midgard in God of War Ragnarok reveals numerous optional adventures that expand the lore and reward intrepid players. Among these side quests is the Guiding Light Favor, which tasks Kratos with investigating the scattered wreckage of Tyr's colossal statue. Completing this exploration objective provides essential resources and a powerful armor set that significantly boosts your defensive capabilities.
How to Trigger the Guiding Light Favor
This regional objective becomes available once you gain free exploration access to the Lake of Nine in Midgard. To officially activate the quest, you simply need to interact with any of the four major runic inscriptions carved into the shattered pieces of Tyr's statue. Each location features glowing golden runes left behind by Tyr's followers, detailing the history of the realm before Fimbulwinter took hold.
As you explore the icy plains, looking for massive metallic debris sticking out of the snow will guide you directly to these points of interest. Interacting with the first runic message prompts Mimir and Kratos to discuss Tyr's past actions, adding a helpful quest marker to your map tracking system. It is highly recommended to clear nearby raider camps beforehand to ensure a peaceful investigation process.
Statue Rune Locations and Exploration Walkthrough
The four distinct wreckage sites are scattered across the northern and eastern sections of the Lake of Nine. The first main piece is Tyr's Left Gauntlet, located toward the north, where burning away obstructive vines reveals the hidden inscription. Right next to the text, players will notice a glowing dig spot containing valuable upgrade components buried in the snow.
Next, traveling toward the Shores of Nine leads you to Tyr's Helmet, which houses another runic message hidden inside the hollow structure. The final two pieces, consisting of the Right Gauntlet and the Spear, are situated along the eastern cliffs near the Raider Stronghold area. Visiting all four spots in any order allows Kratos to fully translate the messages and successfully close out the favor.
Unlocking the Guiding Light Armor Set
The primary motivation for finishing this optional quest is the acquisition of the legendary Guiding Light armor pieces. Each statue location rewards you with a specific part of the set, including the breastplate, gauntlets, and waist guard. When fully equipped, this specialized gear grants a unique chance to increase your strength and luck attributes during intense combat engagements.
In addition to the physical armor pieces, diligent tracking yields rare materials required for late-game crafting and weapon enhancements. Players will also discover the Jotunheim's Essence amulet enchantment, which grants passive statistical boosts depending on your overall luck value. Taking the time to finish these investigations provides a distinct advantage before facing tougher story bosses.
What Do Hummingbirds Eat In Dreamlight Valley
Exploring the vibrant ecosystems of Disney Dreamlight Valley introduces players to a delightful assortment of wild critters that roam the various biomes. Among these colorful creatures, the quick-moving sunbirds, which many players commonly refer to as hummingbirds, are some of the most striking animals to encounter. Befriending these fast flyers requires understanding their unique dietary preferences and foraging habits within their specific territory.
Locating the Sunbirds in the Sunlit Plateau
Before you can begin feeding these beautiful creatures, you must unlock their native home located in the Sunlit Plateau biome. This arid region houses multiple color variations of the species, each appearing on different days of the week. Spotting them is relatively easy due to their bright feathers and the distinct humming sound they make as they hover around local flora.
Unlike some of the more timid animals in the valley, these birds do not require a complex approach strategy or game of chase. You can simply walk straight up to them with their preferred treats in your inventory to trigger the approach prompt. Establishing a daily feeding routine is the fastest way to turn them into permanent companions for your village adventures.
Discovering the Favorite Foods of Each Variant
The diet of these valley hummingbirds revolves entirely around the exotic flowers that grow natively throughout the landscape. However, unlocking their maximum friendship requires matching the specific color of the bird to the corresponding color of the blossom. Feeding a creature its absolute favorite item rewards players with rare motifs and accelerated taming progress.
For instance, the Red Sunbird responds best when offered a vibrant Red Bromeliad plucked directly from the plateau soil. Meanwhile, the Golden Sunbird prefers the bright yellow petals of a Sunflower, which can be grown from seeds purchased at the local beach stall. Memorizing these color combinations ensures you never waste resources on ineffective feeding attempts.
Utilizing Alternative Liked Flowers
If you are struggling to find a specific colored blossom due to daily spawn limits, these avian residents will still accept alternative options. Giving them any standard flower variant from the local area will count as a liked food choice for the day. While this alternative method grants less friendship experience, it still allows you to maintain your daily interaction streak.
Using flowers like the Orange Houseleek or Pink Houseleek serves as an excellent backup plan when your primary inventory runs low. It is highly recommended to gather and store extra blossoms inside a dedicated storage chest near the plateau. Keeping a healthy stock of colorful plants makes your daily harvesting rounds much more efficient.
Unlocking Rewards and Companionship Status
Successfully feeding a sunbird multiple times will eventually unlock the ability to equip that specific variant as a companion animal. Once unlocked, your new flying friend will follow your avatar throughout the entire valley map as you fish, farm, and forge relationships. This cosmetic addition adds an extra layer of charm to your daily resource collection loops.
In addition to companionship, satisfied critters frequently drop valuable dreamlight shards or specialized crafting ingredients upon being fed. These drops are essential for progressing through high-level magic quests and expanding the structural layout of your village. Taking a few moments each day to care for the local wildlife provides consistent gameplay benefits.

Wo Long Hidden Village Key Location
Navigating the mystical and war-torn landscapes of Wo Long: Fallen Dynasty introduces players to various secrets that extend beyond the main battlefields. Among these mysteries is the questline involving the Taoist woman in Mount Tianzhu, who has managed to lose the keys to her locked home. Finding these items requires careful exploration of specific story missions, rewarding players with access to valuable items and hidden treasure chests.
Finding the Taoist House Key Location
The first item you need to locate is the front door key, which is hidden away in a mid-game main mission. To track it down, you must progress until you unlock the mission titled In Search of the Immortal Wizard. This zone features lush landscapes and winding cave networks filled with dangerous demonic entities.
Explore the pathways thoroughly until you reach the deep cave sections guarded by a powerful staff-wielding spider creature. After defeating the threat, look carefully around the immediate stone platforms near the glowing battle flag to find the item. Picking this up will allow you to open the front door of her residence back in the safety of the mountains.
Locating the Taoist Backyard Key
Unlocking the front door is only the first step, as a large backyard area remains tightly locked behind a separate mechanism. To find the next item, players must advance further into the main storyline until they reach the War's Flames in Pujiang mission. This specific region is heavily fortified and forces players to navigate through burning ruins and guarded drainage channels.
As you clear out the obstacles, focus on exploring the later sections of the map that feature heavily guarded stone rooms. Check the dark corners of these rooms to spot the glowing item drop resting on the floor. Returning this item to the village grants full access to the garden plots where precious rewards await.
Unlocking the Village Treasure Chests
Once both keys have been safely returned, you can interact fully with the resident to unlock three locked chests sitting in the backyard. Opening these containers requires trading specific items that you collect throughout your journey across ancient China. Successfully resolving this small neighborhood crisis provides rare upgrade materials and highly effective combat gear to enhance your character build.

Assassin's Creed Valhalla Old Wounds Quest Guide
Navigating the complex narrative of Essexe in Assassin's Creed Valhalla requires a keen eye for detail, especially during pivotal storyline missions. The Old Wounds quest presents players with an intriguing investigation where uncovering the true traitor is essential to maintaining order. Understanding the clues and making the correct choice ensures a smoother progression through Eivor's alliance journey.
Beginning the Old Wounds Investigation
To start the quest, Eivor travels to Essexe to assist Ealdorman Birstan with a delicate political scheme. Upon arriving, you must meet with Rollo at his camp to organize a staged kidnapping designed to free Lady Estrid from her duties. However, before the plan can be fully executed, you discover that someone within Rollo's camp has betrayed him to the Saxons.
Investigating the campsite is the first step toward identifying the culprit behind the ambush. You will need to interact with various highlighted objects around the area to gather critical evidence. Examining the food stores and speaking directly to the two main suspects provides valuable context for your decision.
Evaluating Suspects: Gerhild versus Lork
The investigation centers on two primary suspects within Rollo's inner circle: Gerhild and Lork. Speaking with Gerhild reveals her claim that she was out hunting game while the Saxon soldiers approached the camp. However, examining the meat racks nearby shows that the food supplies are completely empty, casting immediate doubt on her story.
Lork offers a different explanation, stating that he was asleep in the brush and hid when the enemy forces attacked. A nearby patch of flattened grass confirms that someone was indeed lying in wait at that location. Evaluating these physical clues allows players to separate real evidence from deceptive lies during the dialogue phase.
Exposing the Traitor and Consequences
After gathering all available evidence, speak with Rollo to deliver your final verdict regarding the traitor. Choosing Gerhild as the traitor is the correct resolution, as her lie about hunting is exposed by the lack of meat in camp. Accusing her results in Rollo executing Gerhild on the spot, ensuring his camp remains secure for future operations.
If you incorrectly accuse Lork, Gerhild remains free to cause further disruption later in the Essexe storyline. Later in the arc, her ongoing betrayal will result in Lady Estrid sustaining injuries during the staged kidnapping attempt. Selecting the correct traitor prevents unnecessary harm to your allies and keeps the storyline aligned with your strategic goals.
Completing the Quest and Moving Forward
Once the traitor is dealt with, Eivor must help Rollo clear out remaining Saxon troops from the encampment. Defeating these enemies allows Rollo to regroup his men and focus entirely on assisting with the kidnapping plot. Successful completion of this mission unlocks subsequent quests in the Essexe arc, bringing Eivor closer to securing a vital regional alliance.
Taking time to carefully inspect every clue transforms this quest into an engaging tactical puzzle. By following proper investigative steps, players can confidently resolve internal camp conflicts without damaging alliances. Mastering these narrative choices highlights the deep roleplaying mechanics that define the overall Valhalla experience.

Tunic of the Sky TotK Location and Acquisition...
Exploring the expansive subterranean depths of Hyrule in The Legend of Zelda: Tears of the Kingdom provides players with rare historical treasures. Among these nostalgic rewards is the Tunic of the Sky, a distinct piece of apparel honoring Link's journey in Skyward Sword. Locating this hidden chest requires proper preparation, a solid understanding of the underground map structure, and the right navigational strategies.
Locating the Minshi Grove Depths
To begin your hunt for this iconic garment, you must venture directly into the Depths beneath the Great Hyrule Forest region. The absolute easiest point of entry is through the Minshi Woods Chasm, located northeast of the Lookout Landing hub. Diving down this chasm places adventurers in an atmospheric, shadowy environment filled with towering root structures and dangerous gloom patches.
Once you safely land at the bottom of the chasm, look around to locate the Minshi Grove area hidden in the darkness. You should instantly activate the nearby Uasnoum Lightroot to fully illuminate the local terrain and secure a convenient fast travel point. This bright coverage reveals a dense grove of colossal subterranean trees that directly mirrors the forest ecosystem thriving on the surface above.
Reaching the Hidden Treasure Chest
The prized clothing article is securely tucked away inside a large stone chest sitting at the coordinates 1021, 1661, -0570. Navigating toward this specific point forces players to travel deep into the heart of the darkened grove. You must keep a sharp eye out for hostile Evermeans, which are camouflaged enemy trees that blend seamlessly into the environment.
As you approach the target coordinates, look closely for a hollowed-out tree trunk resting on a small raised platform. The stone container holding your reward sits right inside this dark wooden opening. Carefully open the chest to officially add the historic garment to your growing inventory collection.
Upgrading and Utilizing the Armor Piece
The Tunic of the Sky grants a base defense rating of three points when you initially equip it. While it functions beautifully as a cosmetic throwback to past titles, upgrading its durability makes it viable for late-game combat encounters. You can significantly improve its defense statistics by visiting any of the Great Fairy Fountains scattered across Hyrule.
Enhancing this specialized garment requires a steady supply of specific natural resources, primarily baseline materials like Star Fragments and Swift Violets. Collecting the remaining pieces of the Sky set allows you to maximize your combat efficiency while exploring. Wearing the complete outfit unlocks a useful set bonus that increases your overall Master Sword beam attack damage.

Does Gabimaru Get His Memory Back In Hell's...
The dark fantasy anime and manga series Hell's Paradise Jigokuraku features many complex supernatural systems that push its main characters to their absolute physical limits. Among the most dramatic narrative developments is the sudden amnesia suffered by the elite ninja assassin Gabimaru after an intense battle on the island. Fans frequently wonder whether the protagonist ever recovers his lost identity or if the mental damage from his continuous combat remains permanent.
The Cause of Gabimaru's Amnesia
During the intense exploration of the mysterious island, Gabimaru is forced to tap into an intricate spiritual life force known as Tao. Overusing this volatile energy creates severe physiological side effects, which culminate in a sudden and massive loss of his personal memories. He reverts to his cold, emotionless persona, entirely forgetting his deep emotional growth and his central motivation for surviving the deadly expedition.
This sudden mental regression places a heavy emotional burden on his executioner companion, Yamada Asaemon Sagiri. She must find a way to navigate his hostile behavior while keeping him focused on their shared survival goals. The narrative uses this tragic setback to test the authenticity of his psychological transformation away from his brutal upbringing.
The Psychological Journey to Recovery
Gabimaru does eventually get his memory back through a combination of intense sensory triggers and deep emotional resilience during his subsequent battles. The breakthrough occurs when his physical instincts and deeply ingrained feelings for his wife clash directly with his forced amnesiac state. Even without his conscious thoughts, his body retains the muscle memory of his defensive techniques and the emotional core of his shifting morality.
As the deadly trials on the island intensify, encounters with key allies and powerful enemies force his brain to piece his fractured identity back together. The gradual restoration of his mind serves as a vital turning point that empowers him to unleash his full martial potential against the supernatural threats. This recovery confirms that his love for Yui was never a false illusion planted by his clan leader.
How Memory Recovery Shapes the Final Arc
Reclaiming his complete mental history allows the lethal protagonist to formulate a final, cohesive strategy to escape the island with the Elixir of Life. The returned memories provide the precise tactical clarity needed to coordinate with the surviving prisoners and executioners against the immortal Tensen. His restored sense of self ensures he can balance his lethal shinobi skills with the compassionate philosophy he developed throughout his journey.
Ultimately, the resolution of his memory loss highlights the major themes of human connection and personal redemption that define the entire dark fantasy epic. Armed with his true purpose, he successfully navigates the brutal endgame of the story to pursue the peaceful life he always desired. Fans can fully appreciate how this psychological hurdle enriches the emotional payoff of the series conclusion.

GTA San Andreas Netflix Cheat Codes And How...
The release of Grand Theft Auto: San Andreas – The Definitive Edition on Netflix has brought the classic open-world experience to mobile devices everywhere. For many returning players, roaming around the state of San Andreas just does not feel complete without utilizing classic modifications to alter gameplay. Understanding how to activate these shortcuts on modern smartphones ensures you can maximize your chaotic fun without facing frustrating progression blocks.
Accessing the Hidden In Game Cheat Menu
Unlike the original console releases where you had to quickly memorize complex button combinations, the mobile definitive edition introduces a streamlined digital input method. Players can access a dedicated cheat code entry box directly through the options overlay while the game is actively running. Navigating to the accessibility tab within the pause menu reveals the specific text field required to type your commands.
This digital entry system removes the physical constraint of trying to press multiple touch controls simultaneously on a small smartphone display screen. It provides a highly reliable alternative for mobile gamers who want to quickly spawn unique vehicles or instantly adjust their criminal notoriety status. Simply type the correct phrase into the input field and confirm to immediately trigger the desired gameplay modification.
Connecting External Hardware for Classic Inputs
For purists who prefer the tactile feel of retro gaming, utilizing physical peripherals offers a nostalgic way to interact with the mobile application. You can easily pair a compatible Bluetooth keyboard or a wireless console controller directly to your iOS or Android device. Once successfully connected, the application recognizes standard button inputs, allowing veteran players to execute traditional combinations seamlessly.
It is important to note that the timing window for entering button sequences can be slightly stricter on modern mobile ports compared to older console versions. If a specific button combination fails to activate the desired effect, executing the sequence much faster usually resolves the issue. This hardware compatibility successfully bridges the gap between classic console mechanics and modern portable gaming setups.
Essential Codes for Survival and Exploration
Navigating the dangerous neighborhoods of Los Santos often requires an immediate boost to your defensive capabilities and resource pools. Entering the traditional text commands for health and armor ensures that Carl Johnson can survive intense shootouts with rival gang factions. Additionally, this specific command provides an instant cash injection to help you purchase properties and advanced gear early in the narrative.
Spawning rare transportation options remains another highly popular method to explore the massive game map without any structural restrictions. Players can summon high-performance sports cars, heavy military vehicles, or even the iconic jetpack directly to their immediate location. These modifications provide unparalleled freedom, letting you bypass lengthy travel times and dive straight into high-octane exploration.
Understanding the Impact on Trophies and Saves
While altering the game world provides endless entertainment, mobile players must remain fully aware of the consequences regarding narrative progression. Activating any modification automatically disables the ability to earn virtual trophies and achievement badges during that specific play session. To safeguard your hard-earned achievements, it is highly recommended to maintain a clean manual save file before experimenting.
Creating a separate save slot ensures that you can enjoy chaotic gameplay elements without permanently ruining your primary campaign completion statistics. Reloading a clean save file completely restores normal game parameters and reactivates the platform rewards system seamlessly. Balancing these fun alterations with cautious saving habits guarantees the best possible experience on your mobile device.

Marvels Spider Man 2 PC System Requirements Guide
Bringing one of PlayStation's biggest hits to the desktop platform requires a deep understanding of hardware compatibility. Marvel's Spider-Man 2 delivers an expansive open-world version of New York City that relies heavily on modern streaming technologies. Ensuring your computer can handle the sheer volume of data is the first step toward a flawless superhero experience.
Minimum Specifications for Entry Level Play
To experience the game at standard definitions, your machine needs to meet a base level of computing power. An entry-level gaming rig should feature at least an Intel Core i3 or an equivalent AMD Ryzen processor to manage background physics calculations. Graphics processing can be handled by an older card, though you will likely have to lower visual settings to achieve consistent performance.
System memory remains incredibly important for maintaining smooth gameplay during fast traversal mechanics. A minimum of 16GB of RAM is recommended to prevent stuttering as you swing through dense city corridors. Additionally, installation on a traditional hard drive is highly discouraged due to long asset loading behaviors.
Recommended Specifications for Balanced Performance
Achieving a smooth balance between visual fidelity and framerate requires transitioning into mid-tier hardware parameters. A modern six-core processor like the Intel Core i5 or AMD Ryzen 5 allows the software to properly distribute its active operational threads. This setup ensures that complex crowd animations and vehicle densities do not negatively impact your performance during intense combat sequences.
For the graphics card, aiming for standard current-generation components will allow you to enable enhanced textures at higher resolutions. Modern mid-range hardware helps sustain a reliable sixty frames per second without requiring drastic compromises in the display menu. This tier represents the ideal baseline for players who want to experience the narrative without technological distractions.
The Critical Role of Solid State Storage
The architecture of modern open-world titles relies extensively on rapid data delivery systems. Traditional mechanical storage drives are simply too slow to load the highly detailed textures required when web-zipping across the map. An NVMe solid-state drive is highly recommended to eliminate visible object pop-in and prolonged transition screens.
Without fast storage, the game engine will frequently pause to catch up with your character's fast movement speed. Ensuring you have roughly one hundred gigabytes of free space on a reliable SSD will drastically change your overall immersion. Investing in fast storage infrastructure is arguably just as impactful as upgrading your primary graphics hardware.
Leveraging Upscaling Technologies
Modern PC gaming frequently leverages advanced software algorithms to boost rendering efficiency. Features like DLSS and FSR allow the engine to render environments at a lower native resolution before upscaling the final image cleanly. This approach provides a significant boost to your overall framerate while preserving essential edge sharpness across complex architectural geometric lines.
Utilizing these options can help older hardware profiles survive demanding graphical sections. It is highly beneficial to update your display drivers to the latest version prior to configuring these internal settings. Finding the right balance between artificial sharpening and raw processing power allows you to customize the output perfectly for your specific display device.

Mortal Kombat X Cheat Codes And Unlockable Secrets
Mastering the brutal arena of NetherRealm Studios' iconic fighting game requires more than just quick reflexes and flawless execution of complex button inputs. Players seeking to fully experience the roster often look for hidden shortcuts, alternative aesthetic options, and mechanical modifiers to spice up their gameplay. Understanding how the developers integrated these hidden rewards shifts the traditional experience into an engaging treasure hunt across multiple game modes.
Navigating the Depths of the Krypt
The primary method for uncovering hidden content in this installment involves exploring an expansive, first-person dungeon environment filled with interactive puzzles. Players spend Koins earned from standard fights to shatter tombstones, open ancient chests, and unlock secondary Fatalities or unique character costumes. Navigating this labyrinthine map methodically ensures that you can locate crucial combat modifiers without wasting valuable resources on random drops.
Certain coordinates within the zone hold guaranteed rewards that drastically alter the presentation of your favorite fighters. For instance, exploring the icy caverns or the spider tunnels will yield iconic alternative looks like the Sub-Zero Blue Steel variant or Jax's tournament gear. Tracking these specific locations saves hours of aimless wandering and optimizes your currency spending efficiency.
Unlocking Hidden Roster Variations and Factions
Aside from standard cosmetic upgrades, players can access distinct gameplay variations and secret combatant configurations through specific progression milestones. Completing the full narrative campaign is the absolute baseline requirement for expanding your selection screen with essential characters like Shinnok. Furthermore, entering specific input sequences on the character select screen allows you to fight without a variation, offering a classic competitive experience.
Joining an active faction also plays a massive role in acquiring exclusive finishing moves known as Faction Kills. These unique executions change depending on your group allegiance and level progression within the competitive online network. Staying dedicated to a single faction will rapidly maximize your profile rewards and unlock additional background card borders.
Utilizing Hidden Kombat Modifiers
Customizing local multiplayer matches becomes significantly more entertaining when you leverage the hidden modifiers built directly into the custom match system. These parameters allow players to alter active gravity settings, introduce explosive environmental hazards, or turn off blocking completely for fast-paced action. Finding these match conditions typically requires completing specific towers or encountering random drops within the daily challenge rotation.
Many competitive enthusiasts utilize these unique modifiers to practice high-stakes scenarios and test their adaptability under pressure. Testing different combinations with friends creates highly unpredictable matches that diverge from standard tournament rulesets. Keeping your profiles updated and engaged with weekly community events ensures a steady flow of fresh combat parameters.

No Mans Sky Monolith Answers And Puzzle Solutions
Exploring the massive universe of No Man's Sky frequently brings intrepid travelers face-to-face with mysterious alien structures scattered across distant planet surfaces. These towering ancient monoliths serve as historical markers and testing grounds that challenge a player's knowledge of various alien cultures. Successfully navigating these interactions requires careful logic and an understanding of the dominant faction inhabiting the local star system.
Understanding Alien Logic and Decryption
Each monolith encounter presents a unique text-based scenario that describes a tense or bizarre environmental event. To choose the correct response, players must closely observe the behavior and cultural values of the specific alien race associated with the structure. Gek interactions often revolve around commerce and mechanical efficiency, while Vy'keen scenarios favor martial honor and aggressive action.
Correct choices reward players with valuable technology blueprints, rare relic items, and significant increases in faction standing. Making an incorrect choice can result in physical damage to your exosuit or a noticeable drop in reputation with the local species. Taking the time to learn foreign vocabulary words at nearby knowledge stones greatly increases your chances of interpreting the contextual clues correctly.
Navigating Korvax Monolith Scenarios
The synthetic Korvax species focuses heavily on scientific advancement, technological integration, and the preservation of historical data logs. Monoliths controlled by this faction often present scenarios involving digital entities, memory terminals, or strange energy fluctuations that threaten your ship's systems. Choosing options that prioritize the acquisition of knowledge or show respect for the Echoes will yield the best outcomes.
For instance, if a terminal requests access to your suit's internal systems, allowing the scan usually results in a positive reward. Conversely, trying to dismantle the ancient technology for quick material profit will immediately anger the planetary intelligence. Balancing curiosity with caution is the definitive key to mastering these cybernetic riddles.
Locating Planetary Portals through Monoliths
Beyond providing lore and loot, these ancient structures serve a vital navigational purpose for players looking to travel across the galaxy instantly. Interacting with a monolith a second time allows you to locate hidden planetary portals by offering a specific faction relic. You will need to present a Gek Relic, a Korvax Casing, or a Vy'keen Dagger depending on the system's current occupants.
Once the offering is accepted, a navigation marker will appear on your user interface showing the exact location of the portal pad. This mechanism allows players to input specific glyph coordinates and warp directly to distant community hubs or resource-rich solar systems. For more advanced navigation strategies, players can consult the h2.club platform to optimize their deep space travel routes.
Maximizing Rewards and Safety Measures
Before interacting with any ancient structure, it is highly recommended to save your game progress manually at a nearby portable save point. This precaution ensures you can quickly reload your game if a chosen answer results in an unfavorable outcome or permanent loss of resources. Utilizing your scanner can also reveal hidden buried items around the immediate perimeter of the monument site.
Accumulating specific materials beforehand allows you to bypass unexpected environmental hazards triggered by failed interaction attempts. Over time, recognizing the repeated patterns in these extraterrestrial puzzles will transform these intimidating monoliths into highly reliable source nodes for end-game progression assets. Patience and keen observation remain a traveler's most potent tools in the vast sandbox universe.

Thrice Bound Chest Divinity 2 Location And Puzzle...
Divinity: Original Sin 2 is renowned for its intricate quests and environmental puzzles that challenge players to think outside the box. Among the many secrets hidden within the expansive world of Reaper's Coast, the Thrice-Bound Chest stands out as a unique challenge that requires specific character attributes to solve. Unlocking this container rewards adventurers with valuable loot and progresses an interesting piece of regional lore.
Finding the Thrice Bound Chest Location
To begin this puzzle, players must navigate to the Stonegarden Graveyard situated in the middle of the Reaper's Coast map. The chest itself is located in a fiery plot of land towards the northern section of the cemetery grounds. Eager adventurers will spot the ornate container sitting directly inside a patch of everlasting flames that protect it from casual thieves.
Before interacting with the container, it is highly recommended to clear out nearby enemies to ensure a peaceful puzzle-solving environment. You can use teleportation spells to move the chest out of the dangerous fire if your characters are taking too much elemental damage. Once positioned safely, interacting with the object will initiate a strange dialogue sequence spoken entirely in an ancient dialect.
Unlocking the Lizard Password
Solving the mystery of the container requires a character who possesses the Pet Pal talent and the Scholar tag. Players need to head into Ryker's Mansion, located within the same graveyard area, to discover the necessary password. Inside the manor, look for a fiery salamander named Xiuh who rests near one of the primary fireplaces.
A Lizard character like the Red Prince must speak to the salamander to decipher the ancient language properly. You will need to pass a relatively tough persuasion check during the conversation to convince the creature to cooperate. Success reveals the secret phrase needed to bypass the magical wards guarding the treasure.
Alternative Solving Methods
If your party composition lacks a natural Lizard companion, you can utilize Fane's Mask of the Shapeshifter to bypass the restriction temporarily. Transforming an elf or human character into a Lizard allows them to communicate with the salamander and the chest seamlessly. This flexible mechanic ensures that no player is permanently locked out of completing the quest line.
After acquiring the password, return to the container and recite the phrase to break the magical seals instantly. The chest will open to reveal high-tier equipment, gold, and crafting materials suitable for your current level. Taking the time to explore these steps highlights the deep roleplaying freedom that makes this tactical RPG so beloved by fans worldwide.

Sackboy A Big Adventure PS Plus Complete Game...
Diving into the vibrant world of Craftworld becomes even more exciting when the title lands on your favorite subscription platform. Sackboy A Big Adventure offers a delightful shift from traditional creation toolkits to a fully realized 3D platforming experience. Maximizing your experience with this game via your subscription requires a strategic approach to tracking down collectibles and mastering the local mechanics.
Mastering the Core Movement Mechanics
Navigating the complex levels of Craftworld successfully requires a solid understanding of Sackboy's versatile moveset. Combining basic jumps with flutters, slaps, and rolls allows you to cross massive gaps and uncover hidden paths. Timing these actions perfectly is essential for surviving the increasingly difficult trials found in the later stages of the campaign.
Furthermore, the physics-based momentum in this title changes drastically depending on your environmental interactions. Sliding down inclines or grabbing onto moving materials can propel you to otherwise unreachable platforms. Practice these fluid movement chains early in the initial levels to build the muscle memory required for the toughest challenges.
Locating Hidden Dreamer Orbs
Progression throughout this dynamic world is gated by valuable glowing items known as Dreamer Orbs. Every single level contains a specific number of these collectibles hidden behind false walls or awarded for finishing mini-games. Amassing a substantial stockpile of these orbs is mandatory for unlocking the intimidating boss gates at the end of each distinct world tier.
Many of these elusive items are cleverly tucked away in the background or require solving quick environmental puzzles. Keep a keen eye out for glowing zippers or suspicious geometric patterns that hint at a secret sub-area. Revisiting completed stages with a fresh perspective is often the most reliable way to secure a flawless completion rating.
Confronting the Knitted Knight Trials
For players seeking a true test of platforming skill, the optional obstacle courses present the ultimate endgame challenge. These fast-paced time trials discard the colorful storytelling elements in favor of pure mechanical precision and speed. Earning gold medals on these stages rewards dedicated completionists with exclusive cosmetic pieces to customize their cloth protagonist.
Overcoming the strict time constraints demands that you continuously optimize your routing and utilize rolling mechanics for maximum velocity. Avoid unnecessary combat encounters during these runs to keep your forward momentum completely uninterrupted. Studying the specific pattern of moving hazards will eventually reveal the absolute fastest path to the finish line.
Maximizing the Multiplayer Co-op Experience
While the entire campaign is fully playable as a solo journey, sharing the adventure with friends completely transforms the gameplay dynamic. The title features dedicated team-work levels that cannot be accessed without multiple participants working in perfect synchronization. Coordinating your actions allows you to toss companions across large divides and operate complex switch mechanisms simultaneously.
Connecting with fellow enthusiasts online or hosting local couch sessions provides endless opportunities for chaotic fun and creative problem-solving. Make sure to adjust your audio settings to ensure seamless communication during the high-stakes rhythmic levels. Experiencing this platformer with a full team remains one of the most rewarding ways to conquer the vast universe of Craftworld.

A Date To Remember Indiana Jones Quest Walkthrough...
Indiana Jones and the Great Circle brings players a captivating mix of archeological mystery and intense action across beautifully detailed historical landscapes. Among the various side content hidden in the game, the A Date to Remember mystery side mission stands out as a highly engaging puzzle challenge located within the Vatican. This comprehensive guide provides the exact steps needed to uncover every hidden clue and complete this romantic riddle successfully.
Starting the Vatican Side Mission
To begin this narrative adventure, players must navigate to the picturesque gardens situated within the Vatican region. You will encounter a distressed character who requires Indy's unique analytical skills to solve a historical mystery. Exploring the immediate area thoroughly reveals the foundational clues required to kickstart your investigation.
Before diving deep into the puzzle parameters, it is highly recommended to complete any nearby environmental objectives to ensure an uninterrupted playthrough. Eager players can check the latest video game guides to stay updated on similar hidden secrets scattered throughout the main campaign. Gathering your journal entries early will help keep the historical context clear as you progress.
Cracking the Fascist Tent Puzzle
The core challenge of this side mission leads Indiana Jones into a heavily guarded hedge garden area containing a fascist military camp. Sneaking past the patrols allows you to locate a locked supply chest hidden securely inside the primary command tent. Unlocking this container requires finding a specific numerical sequence hidden within nearby field reports.
Investigating the documents scattered across the desks reveals a three-digit safe combination needed to breach the lock mechanism. Inputting the correct code rewards players with an ancient relic that serves as the centerpiece for the final objective. Maintaining a stealthy approach during this segment is vital to avoiding unnecessary combat complications.
Decoding the Relic Clues
Once the ancient artifact is recovered, players must head to the final courtyard location to solve a flag matching puzzle. The objective requires analyzing the distinct designs on the surrounding banners and matching them to corresponding slots on the stone monument. Success relies heavily on consulting Indy's journal to verify the chronological order of the historical events described.
Placing each flag item into its correct destination triggers a hidden mechanism that reveals the final prize. This rewarding conclusion provides valuable exploration points and rich narrative closure for the characters involved. Following these steps guarantees a smooth resolution to one of the most memorable mysteries in the game.

Best Games Like Fear And Hunger
The indie survival horror masterpiece Fear & Hunger captivated players with its oppressive atmosphere, brutal mechanics, and unforgiving difficulty. Navigating its dark dungeons required absolute caution, as every wrong step could lead to permanent injury or total defeat. If you are seeking that same sense of dread and tactical desperation, several distinct titles offer similarly grim experiences.
Surviving the Dark Fantasy of Pathologic 2
Pathologic 2 drops players into a secluded town facing a deadly, supernatural plague where time is your greatest enemy. You must manage hunger, exhaustion, and infection while trying to save the local citizens before the days run out. The game shares a ruthless approach to survival where resources are exceptionally scarce and victories feel incredibly hard-earned.
Much like the dungeon crawler structure, the narrative forces you to make harrowing moral compromises just to stay alive. The bleak world design ensures that your failures carry permanent consequences for the plot and the characters around you.
Embracing the Brutal Freedom of Kenshi
For players who appreciate the complete lack of hand-holding, Kenshi provides a massive, indifferent sandbox world to explore. You start as an absolute nobody who can easily be defeated by standard bandits or harsh environmental hazards. Survival requires cautious resource management, tactical squad positioning, and a willingness to learn from devastating losses.
The title mirrors the harsh nature of dark fantasy RPGs by forcing players to endure severe injuries that alter their gameplay style. Your limbs can be lost in battle, requiring cybernetic replacements if you wish to continue your journey across the wasteland.
Navigating Psychological Horror in Darkwood
Darkwood delivers a terrifying top-down survival horror experience that relies heavily on atmosphere and sound design rather than jump scares. Players must explore a shifting, corrupted forest by day to gather materials and fortify their hideout before nightfall arrives. Once darkness settles, you must survive against horrifying entities that attempt to breach your barricades.
The intense focus on inventory limitations and crafting mechanics creates a constant state of anxiety during exploration. Making mistakes in your layout or running out of defensive tools will rapidly result in an unforgiving demise.
Enduring the Grim Challenges of Darkest Dungeon
Darkest Dungeon combines challenging turn-based tactical combat with heavy psychological stress elements as you lead flawed heroes through ancient ruins. Every expedition takes a toll on your party members, inducing paranoia, fear, and masochism that directly impact their combat performance. Permanent death ensures that every strategic decision in the deep corridors carries immense weight.
The reliance on careful party composition and resource management perfectly echoes the oppressive tension found in classic dungeon survival games. You must constantly balance the sanity of your roster against the driving necessity to collect valuable loot for your hamlet.

Can You Play Black Ops 2 On PS5
Call of Duty Black Ops 2 remains one of the most celebrated first-person shooters in gaming history, remembered fondly for its futuristic branching campaign and iconic multiplayer maps. As modern console generations advance, many community members wonder if their legacy libraries can transition to newer hardware platforms. If you are hoping to relive the classic competitive match updates or jump back into tactical undead maps on Sony's current flagship hardware, understanding the system limitations is essential.
Understanding PS5 Backwards Compatibility Limitations
The PlayStation 5 features excellent native integration for the vast majority of software titles built for the PlayStation 4 generation. However, this architectural compatibility does not extend directly backward to the legacy Cell processor architecture used by the PlayStation 3 console. Because Black Ops 2 was originally authored for that older hardware generation, the modern console cannot natively read the legacy optical discs or execute the original digital binaries.
Sony has previously explored cloud streaming frameworks to bring specific older titles forward into current subscription tiers for modern players. Unfortunately, licensing complexities and server integration hurdles have prevented the classic shooter from joining the current digital catalog. Therefore, inserting your vintage physical media into a modern disc drive will simply trigger an unsupported format notification.
Alternative Methods for Modern Playback
For enthusiasts determined to access their favorite vintage matchmaking lobbies, alternative hardware ecosystems offer the most reliable pathways today. Microsoft established a dedicated preservation initiative that permits players to run their original media smoothly across modern systems. This means the classic shooter remains highly accessible for players who possess alternative current-gen hardware platforms.
Alternatively, the PC platform continues to host active legacy communities through various dedicated digital distribution clients and third-party multiplayer modification servers. Intrepid players frequently utilize these desktop setups to enjoy optimized resolutions and improved performance metrics that surpass the original console versions. For pure PlayStation users, keeping a functional older console hooked up to your display remains the most authentic option.
The Future of Classic Call of Duty Preservation
The landscape of vintage video game availability changes frequently due to corporate acquisitions and structural changes within publishing networks. Industry rumors occasionally suggest that classic shooter experiences could eventually receive dedicated remaster packages or modern ports for current systems. If publisher priorities shift toward historical conservation, we might eventually see these celebrated competitive arenas modernized for contemporary console buyers.
Until official announcements emerge regarding structural remakes, the community must rely on existing alternative hardware ecosystems to keep the classic matches alive. Players looking for similar tactical gameplay experiences on modern systems can explore contemporary franchise releases that pay homage to historical maps. For now, native playback of this specific legacy title remains out of reach for modern Sony hardware owners.

Essential Probability Lessons for Everyone
Probability is a fundamental branch of mathematics that directly influences the choices we make every single day. From interpreting weather forecasts to evaluating financial investments, understanding the mathematical likelihood of events can significantly improve our analytical capabilities. By learning to navigate uncertainty with structured logic, anyone can make more informed choices and avoid common cognitive pitfalls.
Understanding the Nature of Randomness
At its core, probability serves as a reliable numerical measure of uncertainty and random occurrences in our universe. Many individuals mistakenly view randomness as a chaotic force that defies logic or structural patterns. However, establishing a basic mathematical framework allows us to define potential outcomes and quantify our actual chances of success.
Recognizing that individual events are frequently independent prevents us from drawing flawed conclusions based on small sample sizes. For instance, successive independent occurrences do not influence future outcomes, meaning a streak of bad luck does not guarantee a sudden shift. Embracing this truth helps reduce the emotional stress associated with unpredictable daily scenarios.
The Balance Between Luck and Risk Assessment
Distinguishing between pure chance and calculated risk is an essential skill for managing personal and professional endeavors. While certain circumstances rely entirely on external factors, many situations allow individuals to sway results through strategic planning. Developing a keen eye for risk assessment transforms uncertainty from an intimidating obstacle into a manageable variable.
When exploring various modern digital platforms or data models, utilizing a secure and trusted portal like the m88 alternatif link can offer clear practical insights into statistical operations. Familiarizing yourself with how systems display odds can strengthen your computational confidence over time. This foundational knowledge ultimately protects you from making choices out of mere habit or unverified intuition.
Overcoming Common Decision Pitfalls
Human psychology often struggles to process mathematical probabilities accurately, leading to regular errors in judgment. People frequently become overconfident when facing high-probability scenarios, assuming that a high likelihood guarantees an identical outcome every time. Conversely, low-probability risks are often ignored until an unfavorable event suddenly takes place.
To build better decision-making habits, it is highly beneficial to map out complex choices using visual frameworks like decision trees. This structured approach highlights every potential pathway alongside its corresponding consequences, removing emotion from the equations. By focusing purely on measurable data, you can safeguard your resources and establish clear strategic boundaries.
Practical Applications for Everyday Life
Applying statistical thinking to real-life situations does not require advanced computational degrees or complex calculations. You can start practicing by tracking the frequency of basic outcomes in everyday routines or simple tabletop activities. Over time, this consistent observation builds a strong intuitive grasp of behavioral variations and statistical models.
Ultimately, accepting that no decision comes with a absolute guarantee of success is the most valuable lesson probability offers. This philosophical acceptance fosters greater adaptability and resilience when navigating a highly interconnected and uncertain world. With regular practice, the basic principles of chance become accessible tools for achieving long-term personal growth.